You can create sets on your smartphone, tablet or computer.
How I use Polyvore
- Create sets
I prefer to create sets on my iPad which allows me to position items much easier than on my computer. I like the touchscreen feel. However, if I need to cut a certain item, I have to use Polyvore on my computer since my iPad version does not have the “Cut” functionality.
IPhone 7 is simply too small for the type of sets I now create. But if you have a larger smartphone, you can certainly make all the sets on it, if that’s what you prefer.
- Like and Comment
I mostly use iPhone for liking and commenting on other members’ sets simply because I can do this much faster than on my iPad or computer.
How to use Polyvore on iPhone
Sign up and launch the app on your phone, you could set up your profile first.
ME
Go to “ME” at the bottom right of the screen and click on “PROFILE”. See photo below.
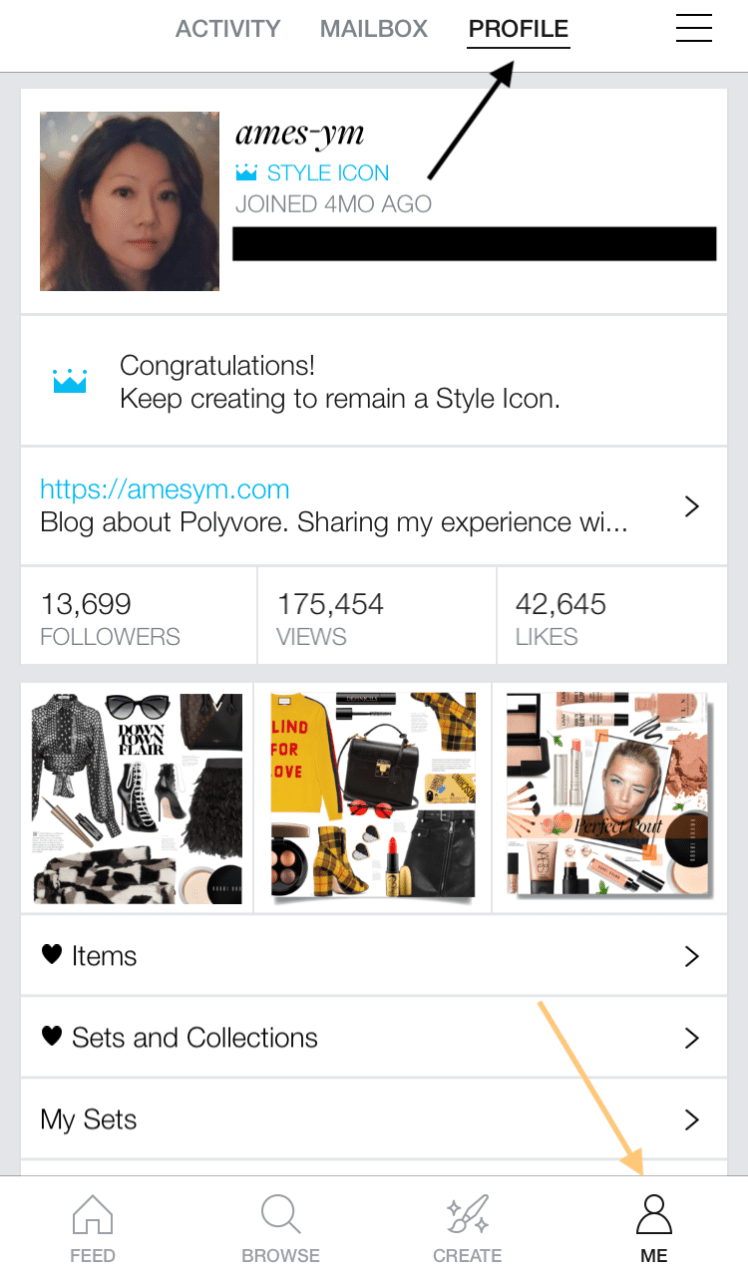
Scroll down and you will see “Profile Settings”.

In “Profile Settings”, you can upload your profile picture, share personal information with other users…. or not. If you own a business, feel free to post company information and web address here. It’s another way to advertise.
When you are finished, don’t forget to press “Update” on the top right corner of the screen. It will take you back to the “PROFILE” page above.
Let’s go through the list in “PROFILE”
- Items – it’s a collection of all the items you’ve liked on Polyvore. Each time you press “like” (heart), the heart turns to red and the item is collected. If you ever need to use an item you’ve collected to create a set, you can find it in here. Below are some of the items I recently liked.

- Sets and Collections – all the sets and collections you’ve liked on Polyvore. Btw, you cannot like your own sets and collections.
- My Collections – allows you to create your own collections by adding sets created by yourself or other users.
- Contest Wins – each time you win a group contest, they are listed here.
- Following – whom you are following
- Followers – who are following you
- Groups – groups you are a member of. Some groups are open so anyone can feel free to join while other groups are private which will require an invitation from the group moderator join. A small numbers of group require applications and not all applications will be approved.
- Account Setting – your log in information, activity and privacy settings. Every time you change a setting, remember to press the “Update” button on the top right corner of the screen to save.
- Sharing Setting – allows you to automatically post sets on your social media accounts or blog if you have one.
Now you’ve set up your profile, what’s “ACTIVITY” and “MAILBOX”?

- Activity – all notifications appear here. You will know who is now following you, who liked and commented on your set, who sent you a private message, and group contest announcements etc.

- Mailbox – pretty self-explanatory. It allows members to privately message each other
FEED
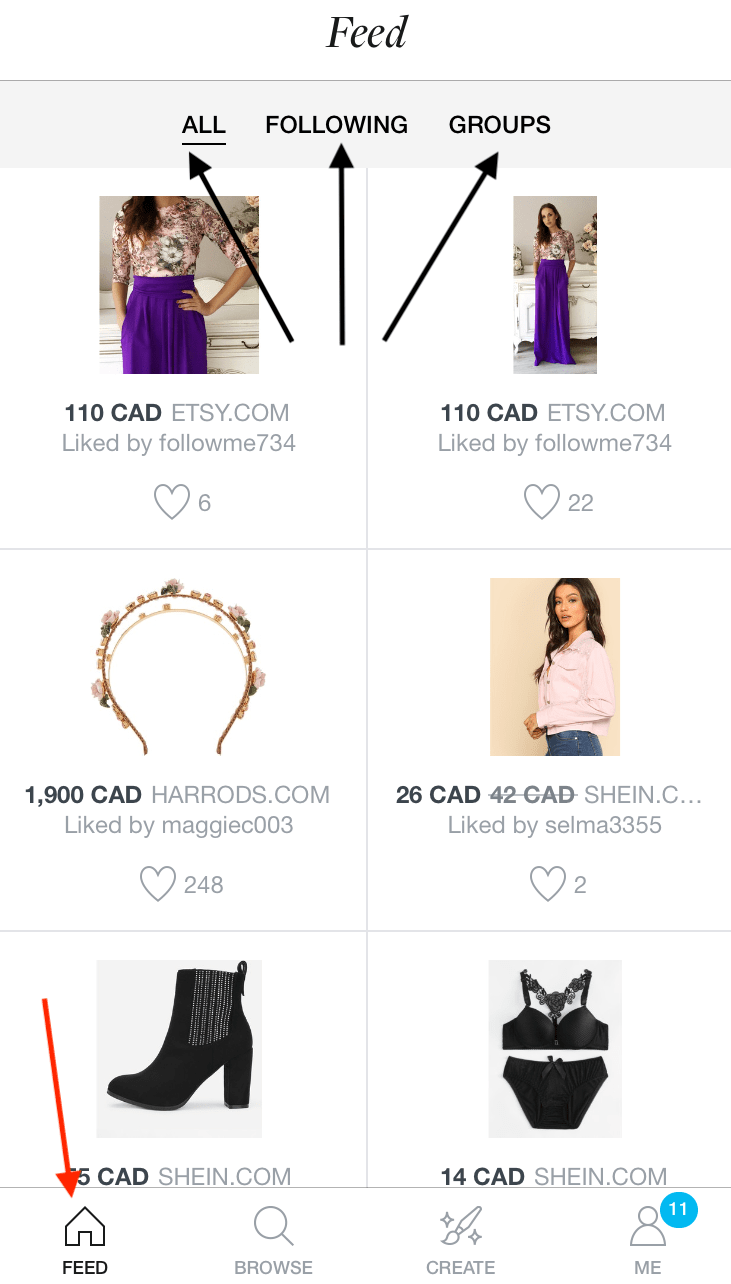
- All – this section includes:
- Items recommended to you or liked by other members whom you follow
- Sets created by members whom you follow
- Sets liked by members whom you follow. So you may or may not be following the members who created these sets. If you see something you like, you can click on that member’s user name to visit the profile and decide whether you want to following her/him
- Following – only shows sets created by members whom you follow
- Groups – you can discover groups, see group contests and sets added to groups. I only discovered this feature on my phone a few weeks ago. LOL.

BROWSE
It’s pretty simple to navigate in this section. You can see the latest trends and view women/men clothing and accessories, beauty products as well as home items. What I want to cover more on is “TOP PICKS”.

Top Picks
I never checked “Top Picks” on my phone until recently. I didn’t know anything about “Top Picks” until December 2017 when one of my sets was selected as a Top Fashion Set (TFS) by Polyvore.
Each day, Polyvore picks 30 TFS and add them to a collection that is showcased in “Top Picks” on iPhone. See picture below. You can also find the daily collections in “Trending” on Polyvore’s home page on your computer or “Trends” on your tablet.
Polyvore has over 20 million users around the world. I don’t know how many sets are created daily on average, but my guess is A LOT. So being picked as a TS, understandably, is considered a big deal in the community.
Top Picks also include weekly Top Beauty (TBS), Home (THS), Art and Expression (TAES or TAS) sets.
Today, it just so happens that I have one TFS and one TBS. Even though it’s never my intention to create sets to impress others, it does feel pretty good when someone else appreciates what I have created.

This takes us to “CREATE”. After all, you joined Polyvore to create. This is the funnest part! 🙂
CREATE
By now, you should know where the “CREATE” icon is. When you enter “CREATE”, you will see this:
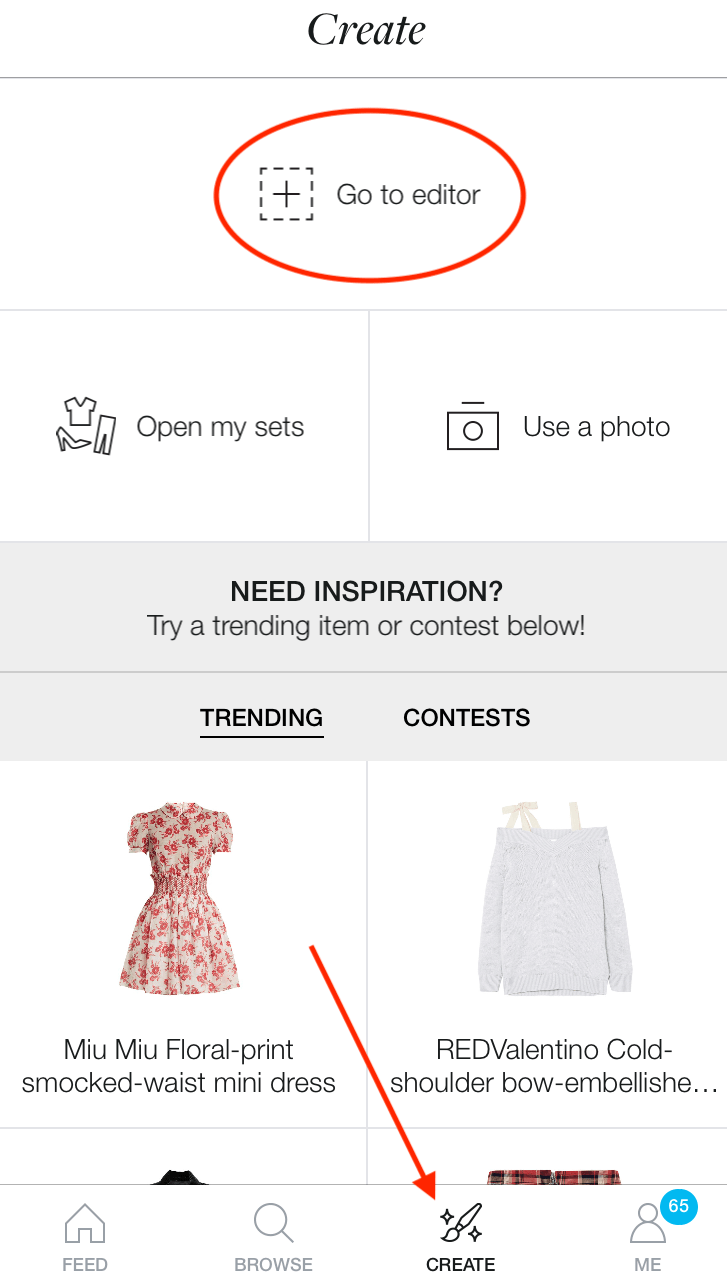
Before we enter “Go to editor”, I just want to quickly talk about “TRENDING” and “CONTESTS”.
- Trending – if you scroll down the page, you will see a lot of items – coats, skirts, shirts, shoes etc. You can use any of them to start making a set if you do not quite know what kind of set you would like to create.
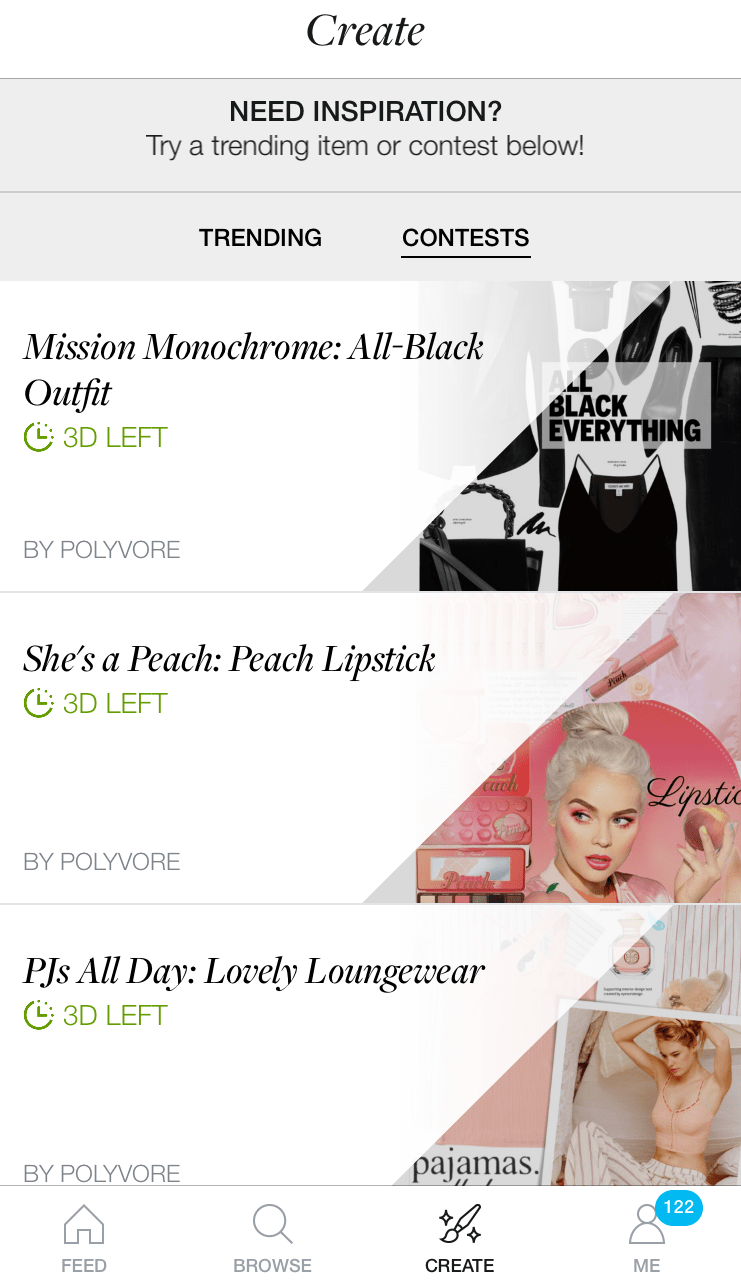
- Contests – would you believe I only saw this feature on my iPhone a week and a half ago? LOL! This is where you will find all the contests that are currently being held by Polyvore and all the groups you belong to. Polyvore contests are always on the top. As you can see from the photo below, Polyvore currently holds three contests.
Ok, let’s enter “Go to editor” to create your first fashion set. This is what you will see:
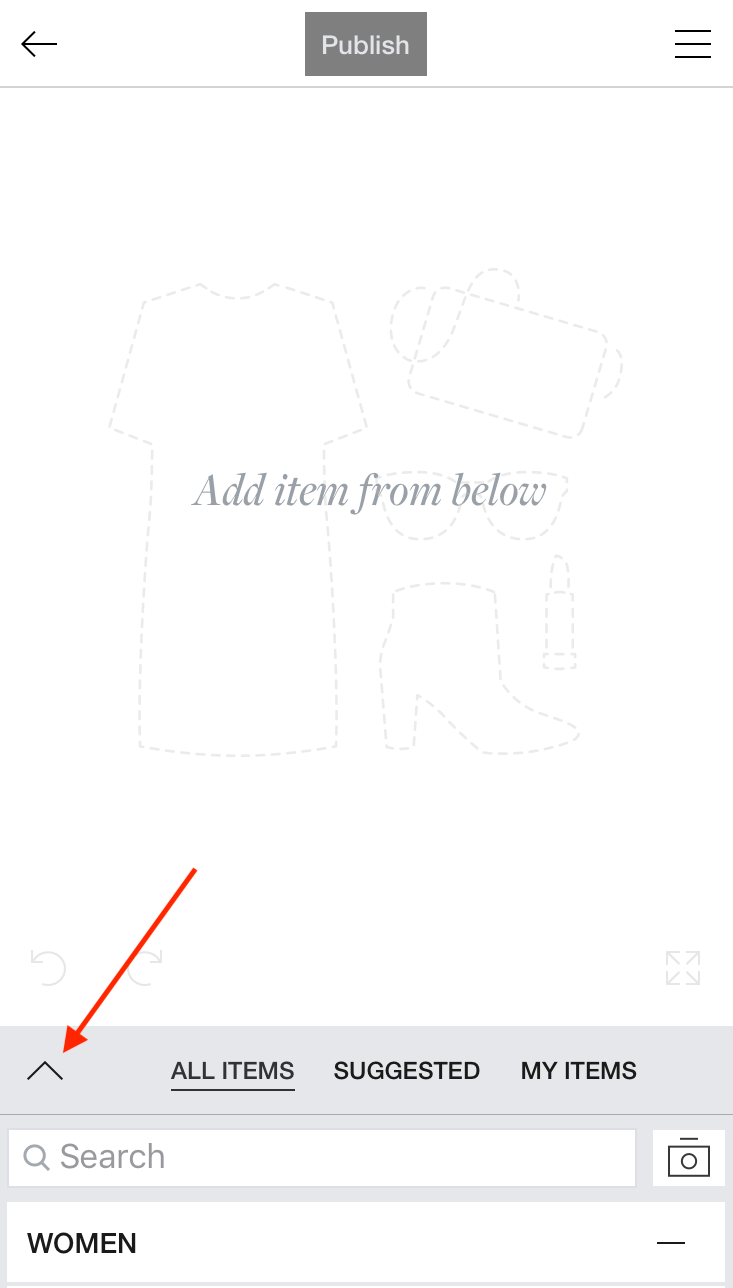
Press the “up arrow” shown in the above screenshot to pull up the item categories. If you have liked/collected some items already, you can retrieve them in “MY ITEMS”. Let’s assume right now you do not have any items in “MY ITEMS”.
Once you pull up the categories, you will see this:

One of the easiest fashion sets to create on my iphone is the “Neat Stack” because you don’t have to cut any items, which I will cover in future posts. There really is no official name for this style. I made it up. LOL
There are so many different styles of sets on Polyvore. You can check out TFS or fellow members’ profiles to get some ideas. But whatever you do, DO NOT COPY other member’s sets.
You will see many members have this message on their profile page: I support the campaign “BE ORIGINAL” – please DO NOT copy sets of other members! Feel free to include this message in your own profile.
You came to create, what’s the fun in copying someone else. You can certainly like/collect an item or items other members used in their sets, but be sure to like their sets as this is just basic etiquette.
Anyway, back to “Neat Stack”. Since Polyvore is running a “Mission Monochrome – All Black Outfits” contest, I am going to make a set with this theme.
Pull up the item categories, you see a list of sub-categories under “Women”. If you scroll down, you will see “Men”, “Home” and “Embellishments” categories.
Above the word “Women”, there is a search area which allows users to narrow down the search. There are literally millions of items on Polyvore. Or you can just browse the sub-categories to select an item.
In this case, I know what I want, so I type in “Black Fendi Top” in “Search”, and ta-da, Polyvore generates a list of Fendi items. I pick the first item.

Press on the first item and it takes you to this screen. Press “Add”.


The item now is in the “Create” area. If you tap on the item, a blue rectangular boarder around the sweater appears. This allows you to move and adjust the size of the item.
Next, I am going to style this top with a mini skirt. So I pull up the item categories again to choose a black mini skirt. I add the item, but initially it looks like this. So I need to position the skirt.

To position the skirt, I tap on the skirt, then move the skirt around to where I want it to be.


I then repeat the process to add a pair of boots, a purse, a pair of sunglasses, nail polish and a candle.
- If you no longer want an item, just press “Remove”.
- To get rid of the blue boarder, tap anywhere below the “create” area on the screen
This is what the set looks like.

If for whatever reason you need to stop before completing a set, remember to save the draft. Go to the menu bar on the top right corner that looks like three lines. See photo below.
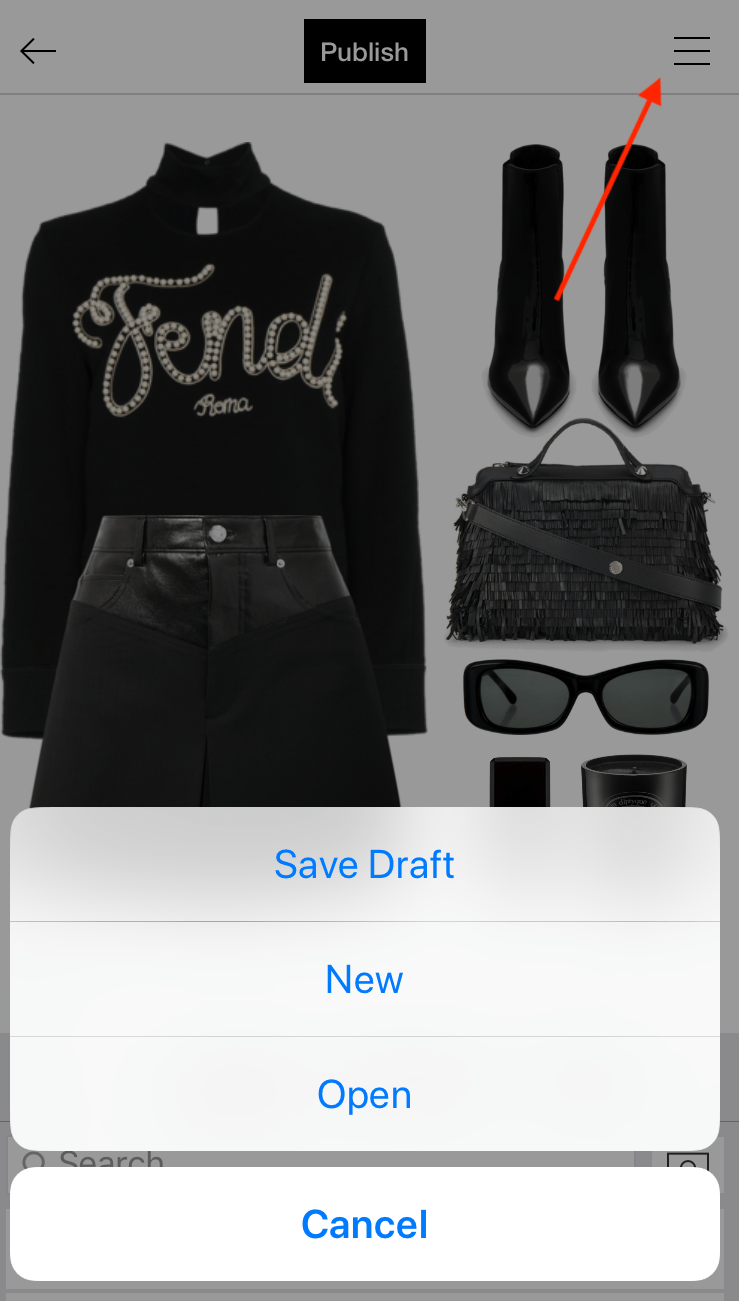
When you return, go to “Create”, enter “Open my sets”. At the top, select “Drafts”, it will pull up all the drafts.
Now you’ve completed the set, it’s time to publish it.
Press “Publish” at the top of the screen. It will take you to the following screen:
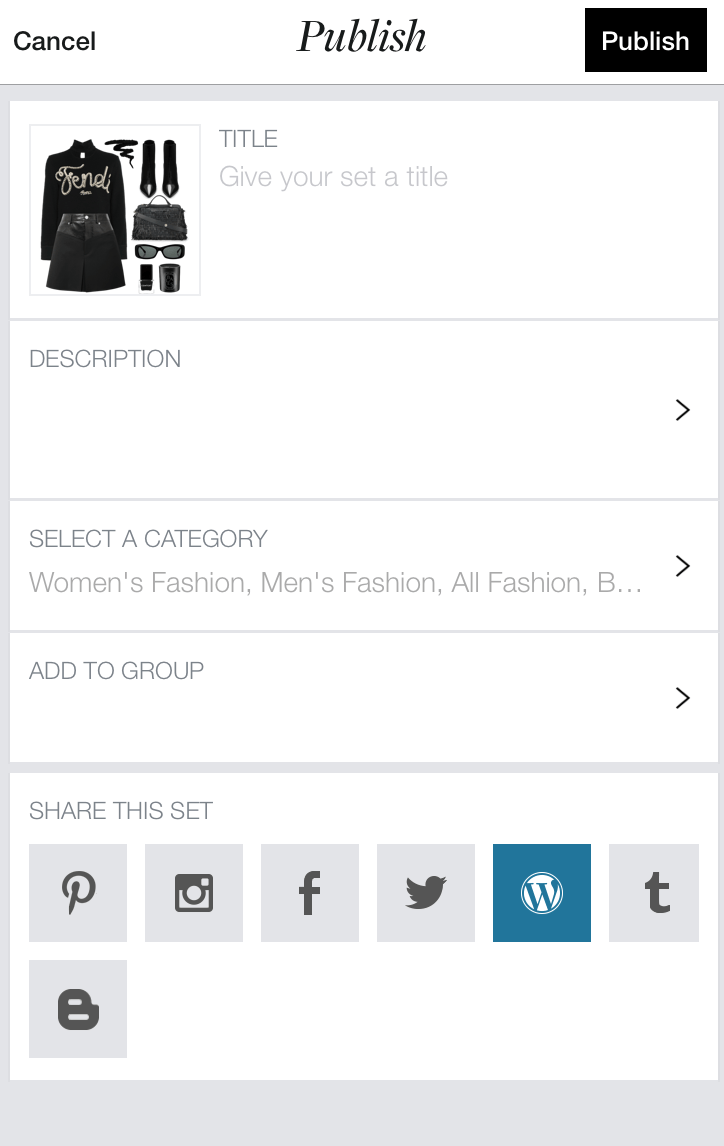
- Title: you can name any title you want. But you don’t have to.
- Description: I usually put in some #. In this case, I would add #allblackeverything #monochrome etc. Again, you don’t have to put anything in description. Some group contests will require you to add certain descriptions. All you need to do is to check the contest guidelines.
- Select a Category: pick the right category.
- Add to Group – if you don’t belong to any groups, don’t worry about it. When you start joining groups, you can post your sets in max. 5 groups each time.
- Share This Set – select the appropriate badge(s) and it will automatically share your sets on your social media accounts or blog every time you publish.
Once you are done, press “Publish” on the top right corner and voilà!!! You can find the published set in your profile under “My Sets”.
That’s it. Have fun creating your first set!
Next blog post – How to Use Polyvore on iPad
Cheers

2 thoughts on “How to Use Polyvore on iPhone”